Raspberry Pi
Displays
Make Your Projects More Interactive
Add a display to your project to show sensor data, status updates, or any other text. Connect LCD displays with parallel or I2C wiring and program them with C or Python. You can even connect an LCD touchscreen to eliminate the need for a keyboard and mouse. Check out the tutorials below to start building!

How to Setup an LCD Touchscreen on the Raspberry Pi
Learn how to setup an LCD touchscreen on the Raspberry Pi in this step by step tutorial that makes it easy for anyone.

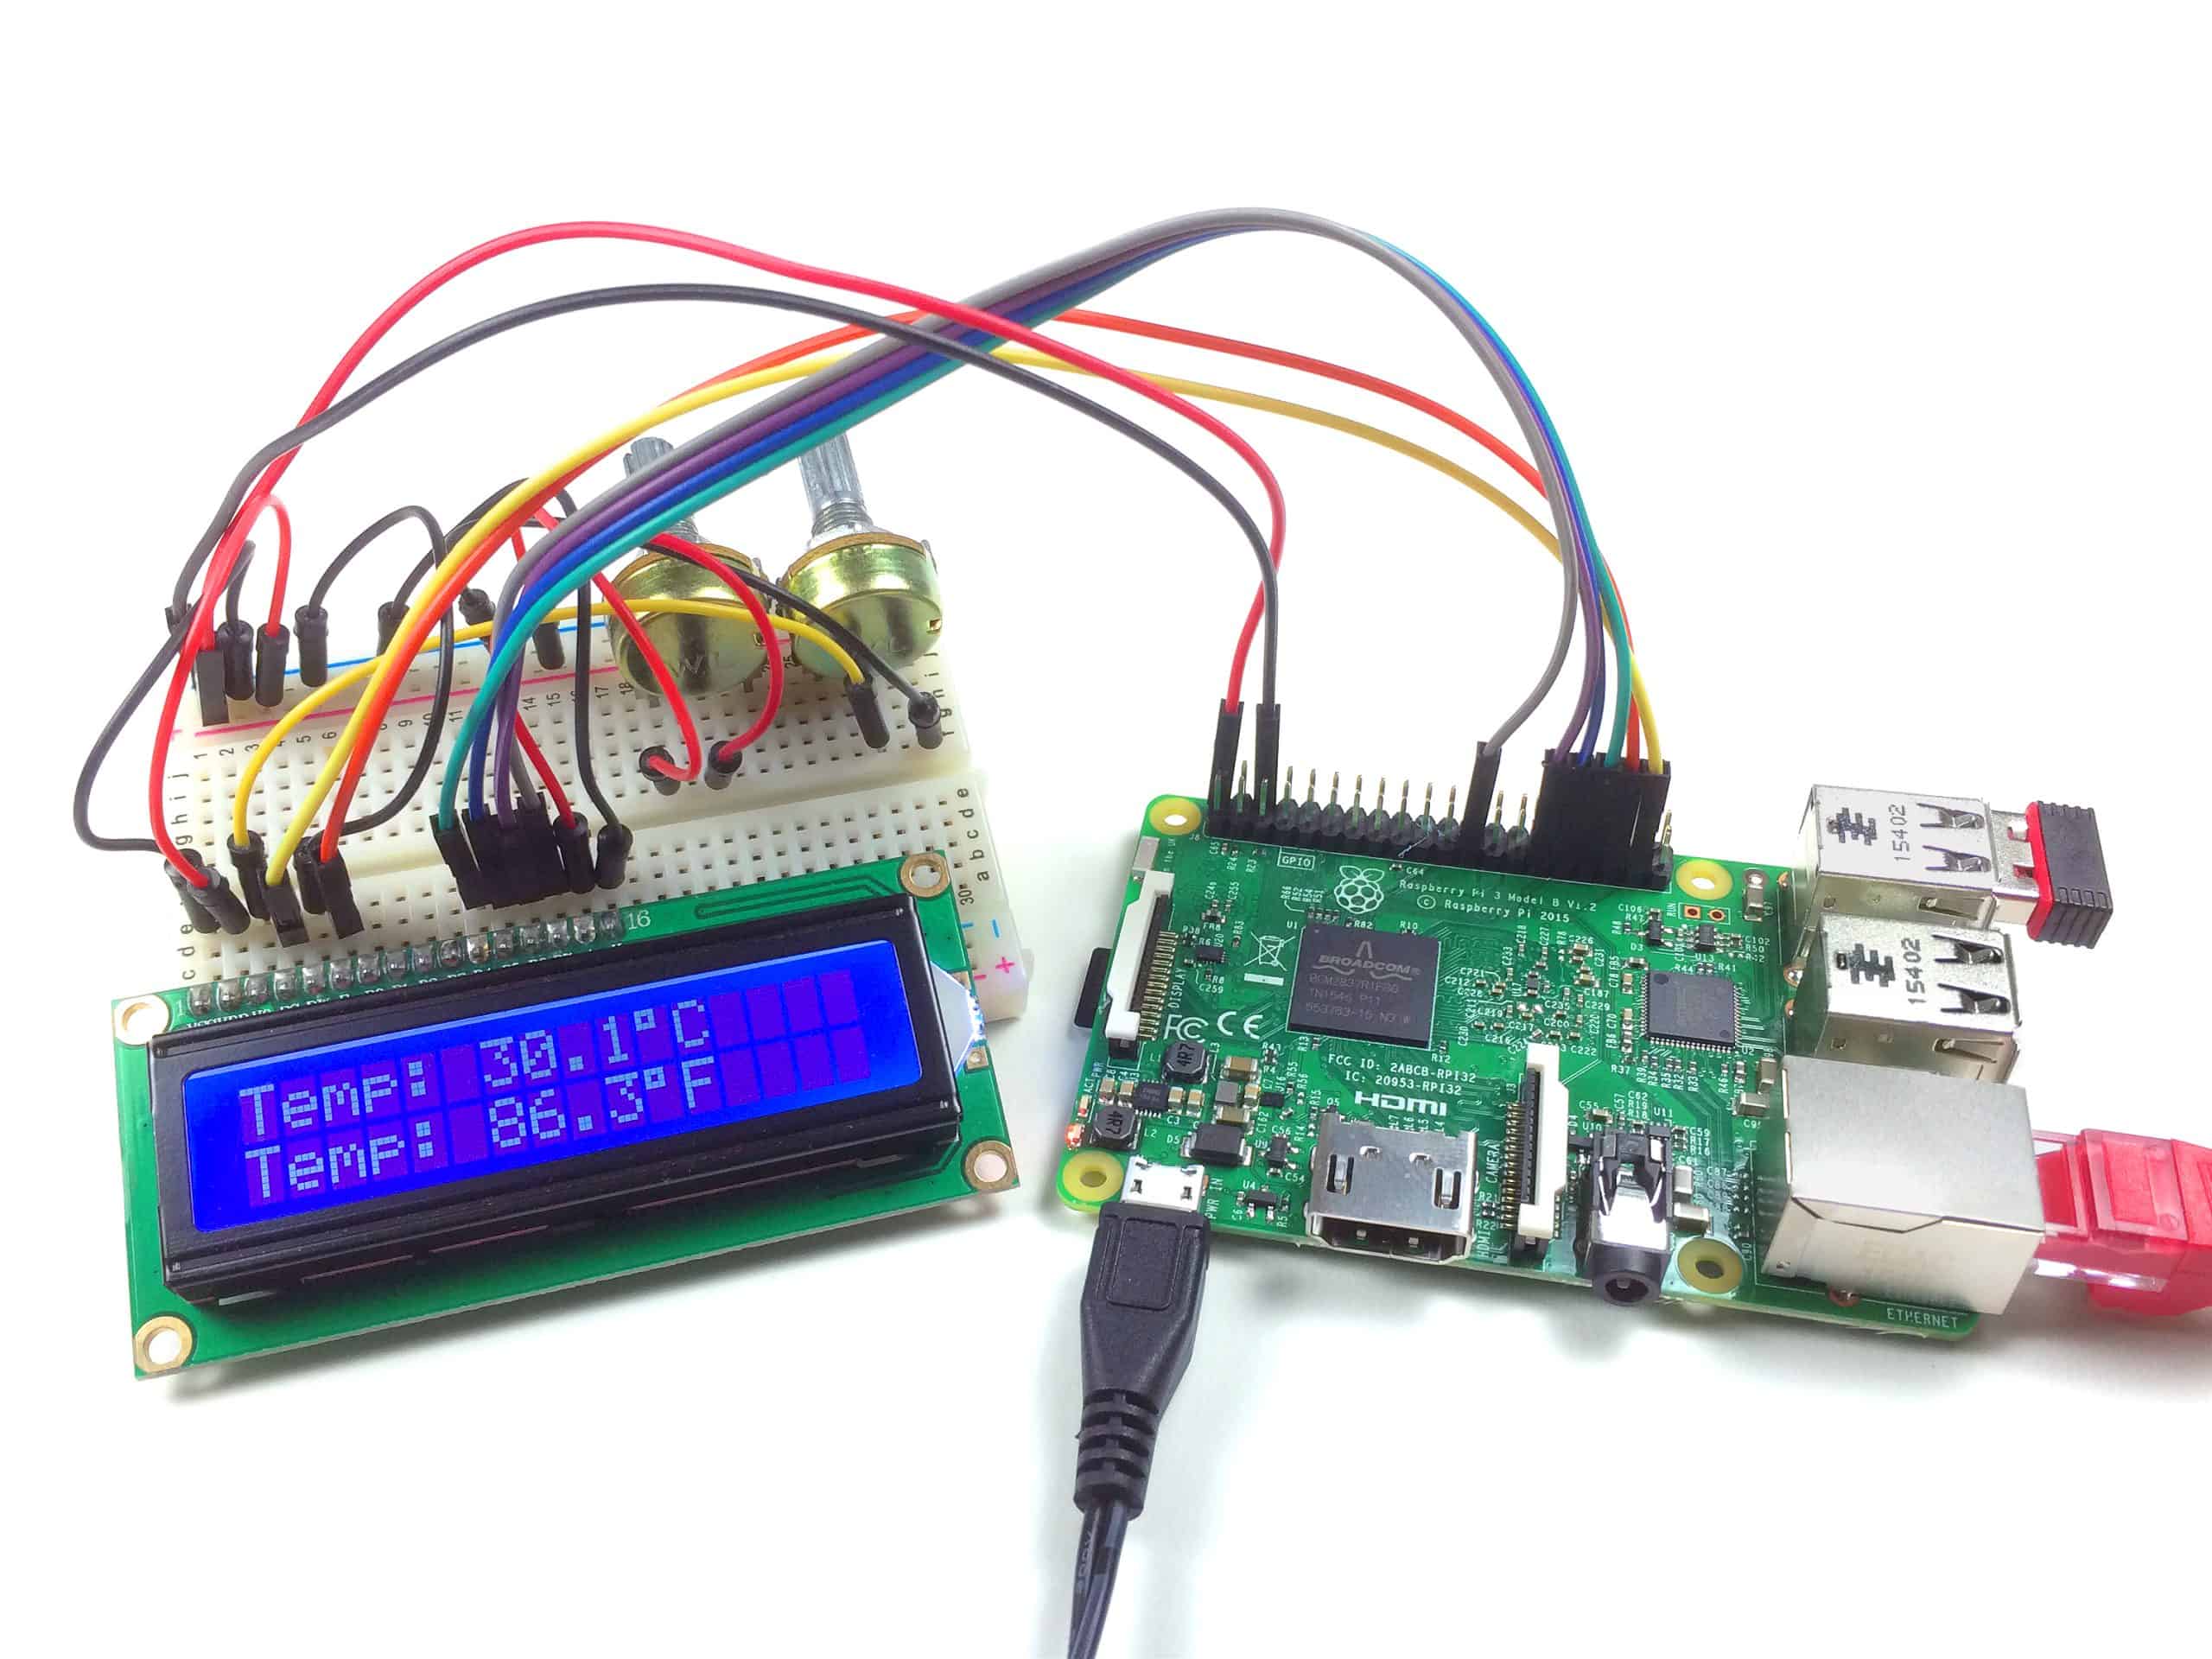
How to Setup an I2C LCD on the Raspberry Pi
How to use I2C to connect an LCD to the Raspberry Pi. Learn how to scroll, position, and clear text, print the date, time, IP address, and sensor data.

How to Setup an LCD on the Raspberry Pi and Program It With Python
Tutorial on how to use Python to print, position, and scroll text, clear the screen, print the date, time, IP address, and sensor data on an LCD.

Raspberry Pi Touchscreen Calibration and Screen Rotation
Learn the step by step process to change the screen rotation and calibration of any Raspberry Pi LCD touchscreen.

How to Setup an LCD on the Raspberry Pi and Program it With C
Setup and program an LCD in C. With example code to position, scroll, and blink text, print the date, time, IP address, custom characters, and sensor data.

How to Create Graphical User Interfaces on the Raspberry Pi
Learn how to control devices and get sensor readings from a graphical user interface (GUI) on the Raspberry Pi. Includes wiring diagrams and Python code.

How to Control LEDs With the Raspberry Pi and Python
Learn how to connect an LED to the Raspberry Pi and how to control the Raspberry Pi’s GPIO pins with Python.

How to Build a Retro Gaming Console With the Raspberry Pi
Build your own retro gaming console with the Raspberry Pi and play games from the Apple II, Atari, Commodore 64, Nintendo NES, Gameboy, Sega, and more!