Edmond Becquerel was the first to discover the photovoltaic effect, whereby electric current and voltage is generated by a material exposed to light. This discovery led to the invention of the first solar cell in 1893 by Charles Fritts.
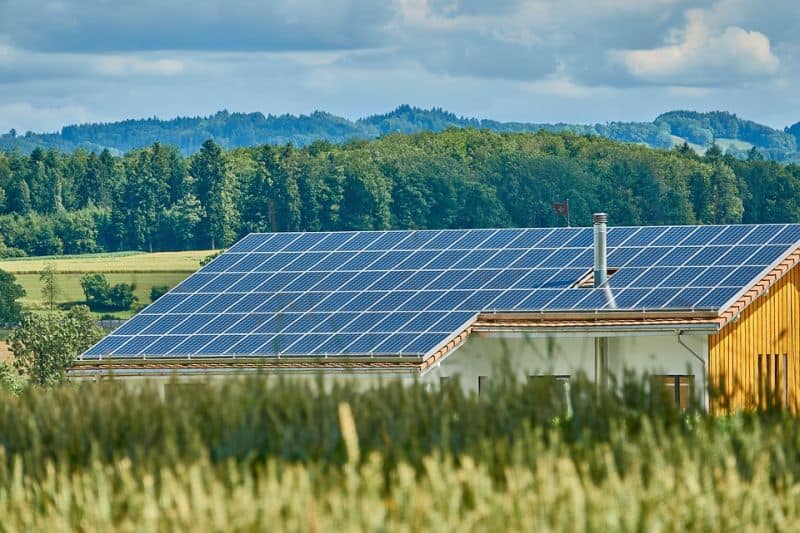
Today we have vastly improved solar panels capable of a wide variety of applications and power generating capacities. Today solar panels are used to power a range of devices from small calculators, to homes and even spacecraft.
 |  |
How a Solar Panel Works
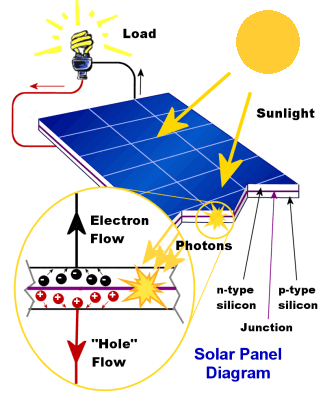
Inside a solar panel, a layer of N-type semiconductor material is in contact with a layer of P-type semiconductor material, forming a semiconductor junction at the point of contact. Conductive plates are attached to each side of the N and P layers, which are then connected to the power output leads. The diagram below shows how they are constructed:
Check out our article on transistors for an in-depth explanation of how a semiconductor junction works.
Free electrons in the N-type material bond with the electron holes in the P-type material at the junction, forming a charge layer. At this point, no current flows.
When photons from the sun’s energy strike the junction, the bond breaks and the electrons and electron holes are forced back into their layers towards the terminals. If the terminals are connected to a circuit, an electrical current will flow.
How to Build a Solar Powered Battery Charger
In this project, we will build a solar powered battery charger that can provide remote power to any device powered by 5V USB cable, like a cell phone or Arduino project. Here is a diagram of the project:

We will use two 3.7V 2600mAh lithium batteries to store the power generated by the solar panel. We will use the TP4056 battery charging module to take the power from the solar panel and charge the battery safely. The TP4056 battery charger accepts an input from 4.5V to 6V and regulates the output charge to the battery. All that remains is to choose a solar panel capable of outputting 6V.
I decided on a 6V 4.5W solar panel. The output current for this is 4.5W / 6V = 750mA. If we assume an efficiency of 85%, this will give us 640mA. As the two batteries in parallel have a total capacity of 5200mAH, we will need to charge them for 5200mAH / 640mA = 8.1 hours at least.
The batteries operate at 3.7V, so we will need to step up the voltage to 5V to allow for USB charging. We can use a 3.7V to 5V step up converter module to do this. However, keep in mind that this module can draw 2A of current, but the maximum current of the TP4056 battery charger is only 1A. If you charge devices that can draw 2A, you risk burning out the TP4056 battery charger.
Here’s the completed circuit:
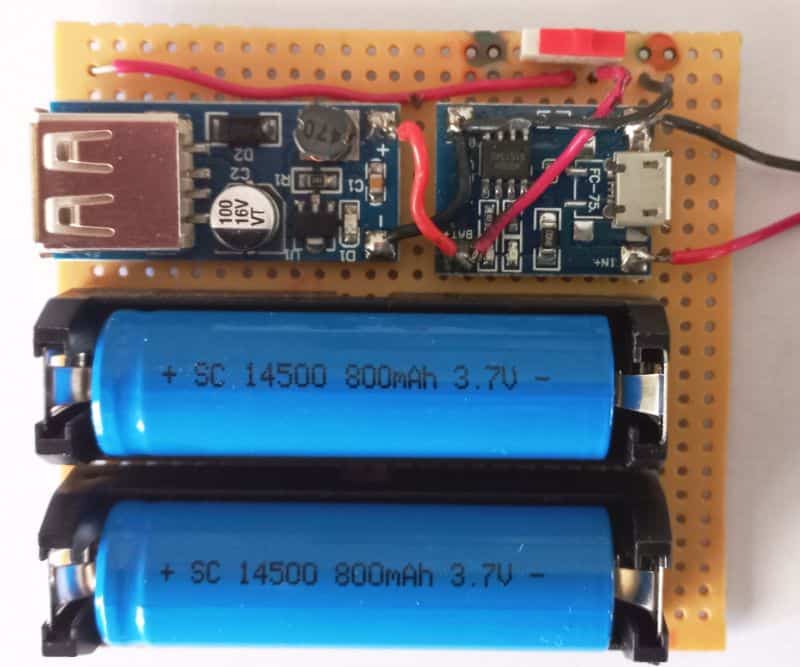
The red and black wires are connected to the solar panel. There is also a red slide switch at the top right to turn the module off when not in use.
Home and Industrial Solar Installations
The solar powered battery charger is nice, but what if we want to use solar power in bigger projects like supplying power to a home?
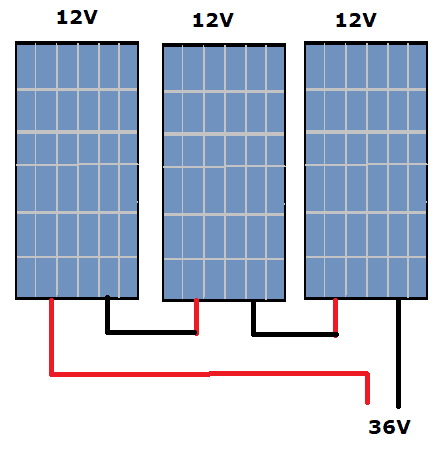
If you connect solar panels in series, the voltage of each panel adds up to a higher voltage:
If solar panels are connected in parallel, the voltage stays the same, but the current from each panel adds to a greater current:
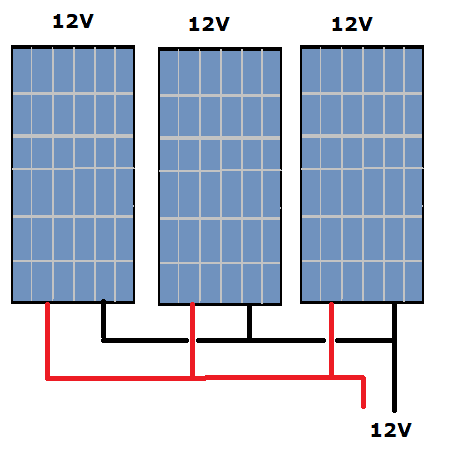
So it is clear that with clever use of series and parallel combinations, you can get the system voltage and current you require.
Just like in the solar powered battery charger project above, you also have to consider the maximum voltage and current ratings for the charge controller and batteries.
Calculating Solar Panel Size
Let’s assume we want to add solar panels to a small holiday bungalow.
First we need to calculate an estimated daily kWh usage. To do this, find the wattage rating for all of the appliances in the bungalow. Then estimate how many hours each appliance will be used on an average day. Now calculate the watt-hours (Wh) for each appliance using this formula:
Watt-hours = watts * hours used
For example, the watt-hours of a 500W refrigerator that operates 12 hours per day is 500W * 12 hours = 6,000Wh.
Allowing for losses and an inefficiency of 30%, we should multiply the watt-hours by 1.3 to get 6000Wh * 1.3 = 7,800 Wh.
Now find the “average daily sun hours” for your location, which can be found by searching online. Now we can calculate the size of solar panel (in watts) that will be needed to provide the watt-hours calculated above.
To do this, divide the daily watt-hours by the number of average daily sun hours. For example, with five sun hours per day in the example above, the size of the solar panel would need to be:
7,800Wh / 5 hours = 1,560W
So we need a 1,560W solar panel (or larger) to provide the required power. This can be split up into multiple panels though. For example, assuming we buy 100W solar panels, we would need at least 16 panels.
Hope this article has helped you learn how to set up and use solar panels in your own projects! Be sure to leave a comment below if you have questions about anything.

